The Goal: to make the application easier to use and your suppliers more self-sufficient.
The primary change is the ability for Suppliers to add their booth and item-level attachments and images, which will be used at the event/show.
Detailed instructions on how to use these enhancements can be found in the help section of the application.
| Old Version | New Version |
 |
 |
Image Above: Left is the current user interface. On the right is the new feature “Import Attachments” added to the pulldown menu.
.
“Import Attachments” is a new menu item and feature.
This feature allows Suppliers to use a built-in search engine to quickly seek booth/product attachments and images. The search engine will reference and pull information from GS1.A second way Suppliers can attach relevant attachments/images to a booth and or product are by navigating to their assigned virtual booth section (by clicking “Booth Setup” in the left-hand toolbar).
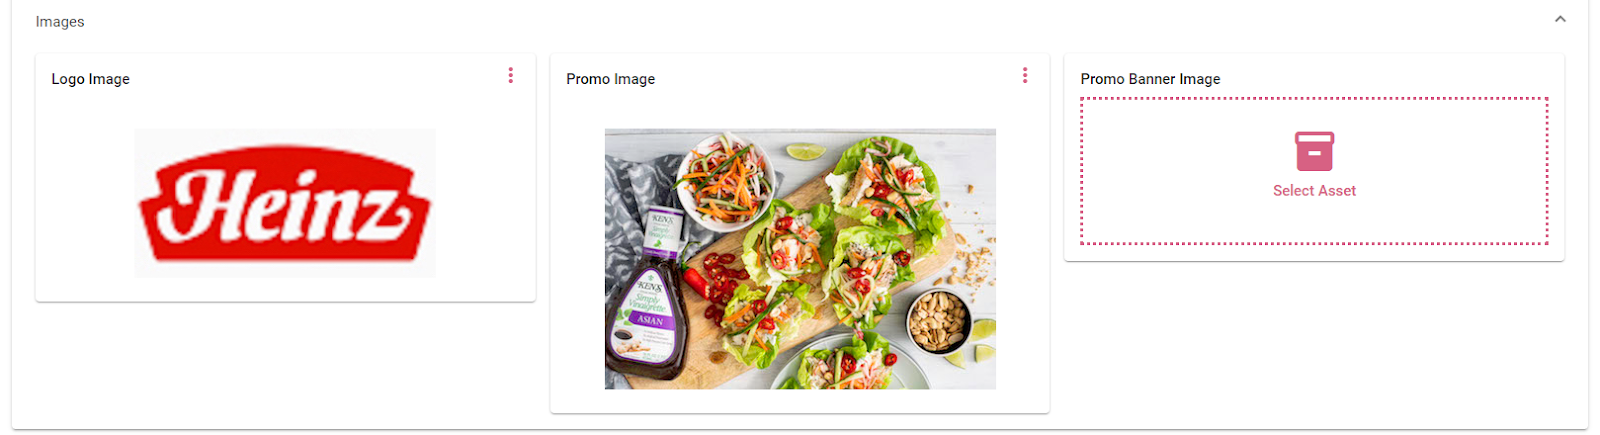
Once there, Supplier Users can select their booth section where Distributors would like them to add appropriate attachments/images. Supplier Users will then be brought to the first screenshot below. Supplier Users select “Images” or “Attachments” to upload files. The menu will expand as displayed in the 2nd and 3rd screenshots displayed here:
Image Above: An example of a Distributor creating a “trade show booth workspace” for a Supplier.
Image Above: An example of a “Promo Image” uploaded by the Supplier.
Image Above: An example of attachements uploaded by the Supplier.
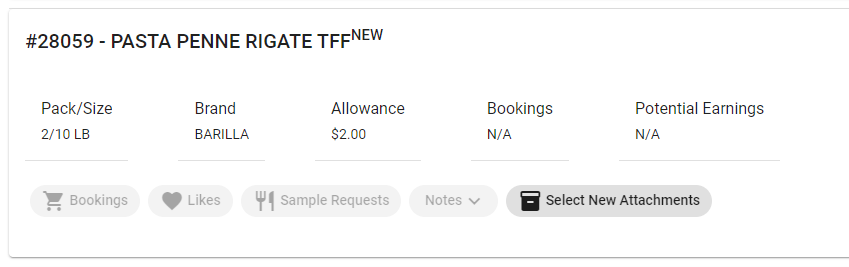
If Supplier Users would like to add an item-level attachment/image, they would scroll down to the item and click “Select New Attachments” as shown below:
Image Above: By selecting “Select New Attachments”, the Supplier is able to add an image with relevant details.
*Note on the user experience update: previously all Supplier-related attachments/images had to be uploaded by the Distributor. Allowing Suppliers to do this task is one of the biggest improvements in this update.
The biggest user experience change in this update is the removal of the “Edit Worksheet” button directly on the screen, replaced with navigation to the ellipses icon in the upper right. Navigating to that icon then produces “Edit Worksheet” in that dropdown.
Previously, there was a dedicated “Edit Worksheet” button as shown below:
Image Above: The current user interface with the "Edit Worksheet" button mid-page
Now, Suppliers simply click on the ellipsis icon — sometimes also known informally as dot dot dot — in the upper right-hand corner. Or in Meal Ticket terms, “the kebab” as shown below:
Image Above: The updated user interface with navigation moved to the upper-right-hand ellipsis icon to navigate to the “Edit Worksheet” pulldown selection.
Previously, booth items looked like the following:
Image Above: The current user interface for Supplier “Booth Item Allowances”.
Users could add a note, like, or request a sample by clicking on the ellipses on the far right-hand side.
Now, to add a note, like, sample, etc, you simply click on the down arrow under the ‘Show All” section as shown below:
Image Above: The new user interface with “Show All” at the far right, where Suppliers now add relevant notes, likes, samples etc. to products/SKUs.
The results:
Image Above: The new user interface with details after data is imported for a product/SKU.
Final Note
We’re here to help!
If you or your team have questions on this update don’t hesitate to contact your Meal Ticket Customer Success Manager, or feel free to call us for a quick overview of the update at (208) 352-6240. Or email us at support@mealticket.com.